All Categories
Featured
Table of Contents
- – Resetting the Check Engine Light
- – Discovering Your Vehicle’s OBD-II Port
- – Hooking Up Your OBD-II Scanner
- – How to Read DTCs
- – Making Sense of Diagnostic Trouble Codes
- – Resetting the Check Engine Light
- – Non-Scanner Reset Methods
- – The Value of Routine Diagnostics
- – How often should I reset my Check Engine Light?
- – Can I use any OBD-II scanner for my vehicle?
Resetting the Check Engine Light
The Check Engine Light (CEL) serves as a vital warning for vehicle owners, alerting them to potential issues within the engine or emissions systems. This indicator can stem from a myriad of issues, from minor faults like a loose gas cap to more serious concerns requiring immediate attention, making it crucial to respond promptly. Utilizing an OBD-II (On-Board Diagnostics II) scanner to reset the Check Engine Light can not only alleviate the warning but also provide insights into the underlying issues through Diagnostic Trouble Codes (DTCs). This guide thoroughly breaks down how to efficiently reset the Check Engine Light using an OBD-II scanner, ensuring a better understanding of your vehicle's health and maintenance requirements.
The OBD-II system has been an integral part of vehicle diagnostics since 1996, as mandated by U.S. law. It is designed to monitor the performance of the vehicle's engine and emissions controls, significantly enhancing diagnostic capabilities. This system not only optimizes engine performance but also assists in reducing harmful emissions. Connecting your vehicle to an OBD-II scanner simplifies the process of diagnosing faults, as it provides real-time data about the vehicle's operational health.
Discovering Your Vehicle’s OBD-II Port
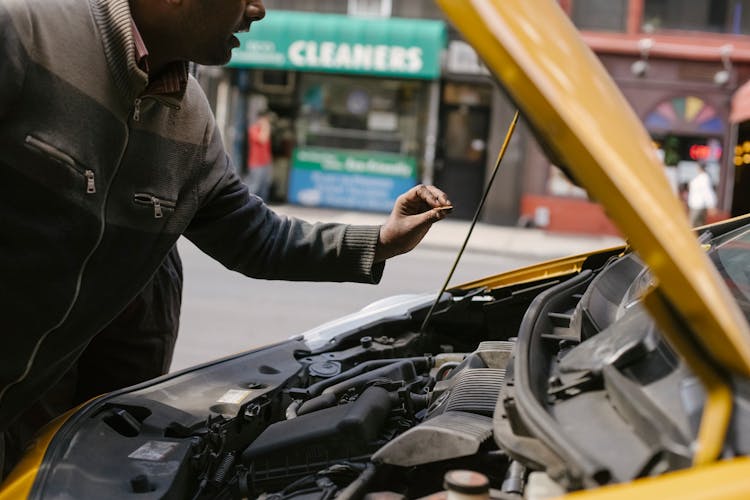
To start the reset process, you must first locate your vehicle's OBD-II port. Typically positioned beneath the driver's side dashboard near the steering column, this 16-pin connector is essential for connecting to the OBD-II scanner. In some vehicles, you might need to remove a cover or trim panel. If you're having trouble finding it, consulting your vehicle's manual or performing a quick internet search for your specific model can be beneficial.
Hooking Up Your OBD-II Scanner
Once you’ve located the OBD-II port, you’re ready to connect your scanner. First, ensure that the ignition is in the ON position, but do not start the engine. Securely plug the scanner into the OBD-II port, ensuring a snug fit. If the connection feels excessively tight, avoid forcing it, as this could damage either the port or the scanner. After a successful connection, the scanner will often power on automatically.
After connecting the scanner, you will be able to read the Diagnostic Trouble Codes displayed on the scanner. These codes are vital for diagnosing the specific issue causing the Check Engine Light to illuminate. Each code consists of a letter followed by four numbers, such as P0420, which corresponds to specific problems relating to the vehicle’s performance or emissions systems.
How to Read DTCs
Once your OBD-II scanner is connected and powered on, navigate to the proper section to view the Diagnostic Trouble Codes. The scanner will display any recorded codes, each indicating a different aspect of the vehicle's performance or issues. For instance, a P0300 code signifies a random/multiple cylinder misfire, whereas a P0128 code indicates a coolant thermostat issue. Ensuring clarity about these codes is essential, so having a reference guide or access to an online database can aid significantly in diagnosing the exact problem.
Making Sense of Diagnostic Trouble Codes
Proper interpretation of these codes is crucial. By referencing a code library or utilizing online resources, you can distinguish whether the problem is minor or requires urgent attention. Some codes may suggest simple fixes, such as replacing a faulty sensor or tightening a component. Knowing the severity of the codes can help you prioritize repairs and potentially save money by addressing issues before they escalate.
Resetting the Check Engine Light
After diagnosing the issues and making necessary repairs, you can proceed to reset the Check Engine Light. Using the scanner's interface, select the appropriate option to clear the logged fault codes. After confirming this action, the scanner will communicate with your vehicle's onboard computer and erase the codes. A successful reset will mean that the warning light should no longer be illuminated.
After resetting the Check Engine Light, it’s advisable to conduct a drive cycle. This involves driving your vehicle for about 30 to 100 miles, allowing the onboard systems to recalibrate. During this time, various sensors will be monitored to confirm that the issue has indeed been resolved. If the Check Engine Light triggers again during this cycle, it may indicate that further diagnostic work is needed to address lingering issues.
Non-Scanner Reset Methods
If you find yourself without an OBD-II scanner, there are alternate methods you can utilize to reset the Check Engine Light. One common approach is to disconnect the vehicle's battery. By removing the negative terminal for approximately 15 minutes, you can clear the vehicle’s ECU (Engine Control Unit) memory. However, this practice is not recommended as a primary method, as it may erase other essential settings, and should only be used as a last resort.
The Value of Routine Diagnostics
Resetting the Check Engine Light with an OBD-II scanner offers a straightforward solution to minor vehicle issues, aiding in early detection and diagnosis. Proactively addressing concerns through regular scans not only maintains vehicle reliability but also keeps repair costs manageable. It’s advisable to incorporate regular diagnostic checks into your vehicle maintenance routine to catch issues early, allowing for timely correction before they develop into hefty repair bills.
As a quote by Benjamin Franklin states, “An ounce of prevention is worth a pound of cure.” This saying rings especially true when it comes to vehicle maintenance. Staying ahead of potential issues through diligent monitoring and regular use of an OBD-II scanner can significantly enhance the longevity and efficiency of your vehicle.
Statistically, regular vehicle maintenance can reduce the likelihood of major repairs by up to 50%, prolonging the vehicle’s lifespan significantly. A timely diagnostic can prevent incursions into your budget while enhancing your driving experience.
Connecting to OBD-II scanners becomes an incredibly useful tool for every vehicle owner. Check out the OBD-II Codes Guide for detailed insights into vehicle diagnostics.
To ensure clarity, invest in an OBD-II scanner that’s both user-friendly and reliable. For instance, the Zmoon OBD2 Scanner can provide essential diagnostics for your vehicle.
How often should I reset my Check Engine Light?
Can I use any OBD-II scanner for my vehicle?
Table of Contents
- – Resetting the Check Engine Light
- – Discovering Your Vehicle’s OBD-II Port
- – Hooking Up Your OBD-II Scanner
- – How to Read DTCs
- – Making Sense of Diagnostic Trouble Codes
- – Resetting the Check Engine Light
- – Non-Scanner Reset Methods
- – The Value of Routine Diagnostics
- – How often should I reset my Check Engine Light?
- – Can I use any OBD-II scanner for my vehicle?
Latest Posts
Cultivating Joy The Essentials of Apartment Gardening
Harmony for Health: Diving into Sound Therapy Practices
The Delights of Bermudian Seafood
More
Latest Posts
Cultivating Joy The Essentials of Apartment Gardening
Harmony for Health: Diving into Sound Therapy Practices
The Delights of Bermudian Seafood